Cozy Castle

Looking for renovation ideas? You might find some by looking at mine. This isn't a cook book so I'm not going to give every little detail, just the highlights.

10 October 2006

Trying out the sauna

Thanks to everyone who's visited my website. I'm surprised by how many hits I've been getting. Anyway the sauna is operational and I love it.


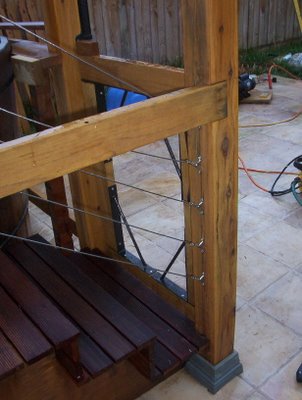
Here's a view from the hot tub deck.


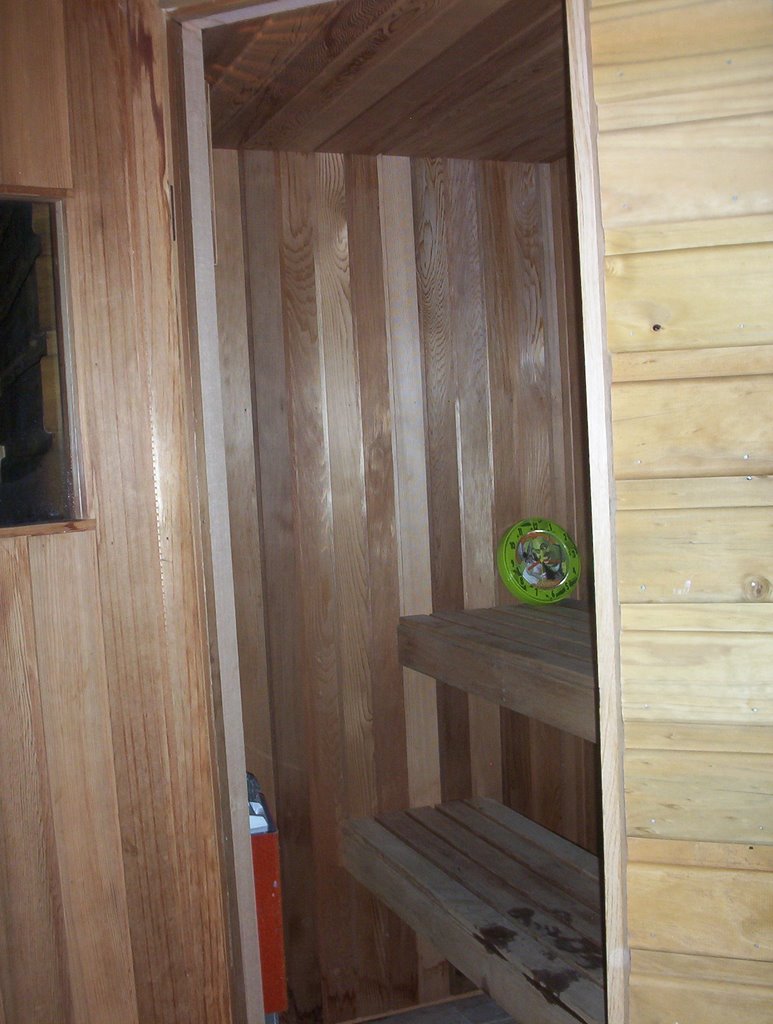
Lots of lovely wester cedar inside.


The Tylo heater is quite powerful - about 5kW. The rocks are for making steam - just add a dash of water.


That's 80 degrees C on the thermometer (hot hot hot) and the camera steamed up.


After 10 minutes of that, I turned this cooked lobster colour.

Restoring the timber

The old cedar lining was showing some stains and it had gotten a bit water stained after sitting in my yard for months. I cleaned up the interior with oxalic acid. This is wonderful stuff for rejuvenating old timber.


Here's the interior after cleaning with oxalic acid.


I made a mixture of oxalic acid and water and applied it with a paint brush. The benches were a bit stained, but they came up like new.

Here's the finished sauna.

27 July 2006

Sauna taking shape

Another weekend and the sauna is starting to take shape. We built the roof on the ground with the idea of lifting it on, after it was finished. The more things we nailed to the roof, the heavier it got (of course) and by the time it was finished it was really really heavy!

Here's the roof nearly finished.

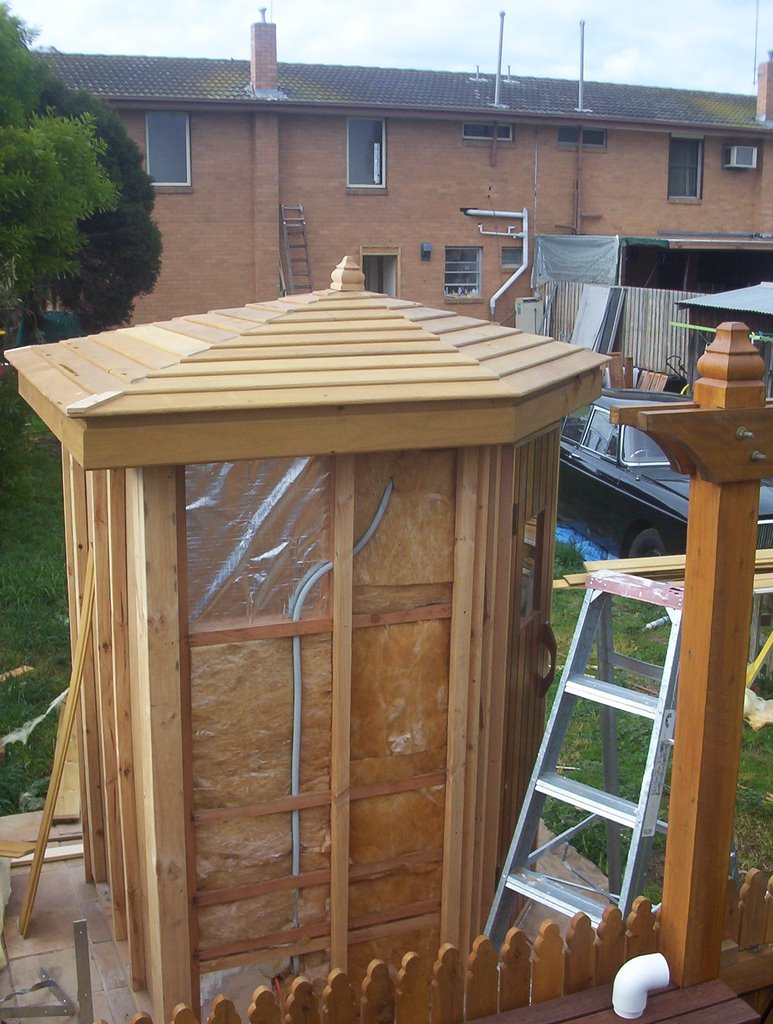
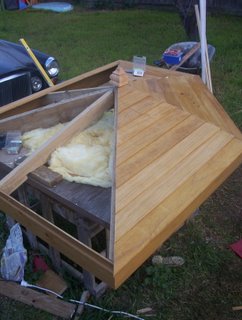
With a lot of effort, we lifted one edge of the roof over over the walls, but it was so heavy it seemed like it was in danger of crashing down. We managed to lift the other end up by propping it up with two posts, but they didn't seem at all stable. I put my foot right through the bottom rung of a old timber ladder during the lift with my 90kg weight and around 100kg or so of the roof, the rung gave way under the strain (that ladder is definatly ready for the tip now). Finally we got it over the walls without serious incidents and it looks pretty good. Looking back, it was probably a bit dangerous and I should have asked more people to help me. Work safe people and don't trust rickety timber ladders.

Here's the roof in position and the sauna is starting to take shape.

26 June 2006

Hot Tub nearly finished.


We've finished the ballustrade and the handrails and screwed pickets all around to make the tub child proof.

That's the wood work finished, now I just have the plumbing and wiring. I've decided to put the heater on the sauna wall - which I havent' finished building yet. It's all so close yet so far away. I just hope I get the tub working before the end of winter.


Spa dealers call their products "portable spas" thereby suggesting that they're not covered by building regulations and you can just put one where you like without any permits. My local council seems to have a different interpretation of the law and wants a building permit and a compliant child proof pool fence. Whatever the law is, people installing a spa should think about the dangers. My own 2 year old daughter is so adventurous and blissfully anaware of danger.

Food for thought; in the US there are considerably more guns than swimming pools, yet they cause about the same number of accidental deaths. A pool is 100 times more likley to accidentally kill someone than a gun.

24 June 2006

Pyramid roof for the suana part 1

For this project, I've aquired a second hand sauna, which was indoors and I'm making a lot of changes to make it suitable for outdoors. The original roof was quite flimsy - with a 45mm frame covered with plywood. I've come up with a design of a 5 sided pyramid which I think will be much more interesting than most common roof shapes.

We're building the roof on the ground with the . First we installed some ridge beams which run from the centre of the roof past each of the corners. This sauna happens to have 5 corners, so that's what the roof will have also.


We installed some facia plates around the perimeter of roof which you can see in this next photo.

The geometry of the roof is pretty complicated, so when we fitted the boards to the roof, they formed some interesting patterns as they intersected at all different angles.

Here were are halfway finished the roof boards.


23 June 2006

Stainless Steel Balustrade

To make a barrier around the deck, I've built a balustrade made from stainless steel rope. The ropes start and finish with stainless steel saddles screwed to the sides of the posts - The ends of the rope are formed into loops with swags and timbles which are compressed on with a special crimping tool.


Here's a couple of ropes installed. The turnbuckels on the ends are for tensioning the ropes.

For the corner posts, I've drilled angled holes for the stainless rope.


To drill holes at angles like this, I aimed the drill like aiming a gun. I put my eye behind the drill and sighted down the bit aiming at where the drill hole should come out the other side. I didn't drill all the way through, but drilled in from the other side as well, trying to make the two holes meet in the middle which is a little trickey.

I installed the stainless steel rope to run down the slope of the stairs and finished it off with saddles on the end post. I bought all of the stainless steel components (including hire of the crimping tool) on ebay.

19 June 2006

How to form up a slab with rounded corners..


When I planned the slab I decided that rounded corners would make a nice landscaping feature. I also wanted the slab to have a nicer edge than cast concrete. The solution I came up with managed to do both. It set the project back about a weekend, but the results were worth the trouble.

The back and sides of the slab had formwork made from timber planks (as usual for pouring a concrete slab). The front was formed from a single course of textured concrete blocks. I had to excavate a bit deeper in the area where the blocks go and I put down a strip of concrete for the blocks to sit on. Next I mortared the blocks in place to make up the front edge form work.

Renovating isn't a race and it's important to get a result that you're happy with.
The steel mesh even goes in the concrete under the bricks to keep everything together. I like to build things to last.

18 June 2006

Engineering the slab.

This project started out with some research. There are plenty of information sources on the internet to describe how to pave with concrete. All saying different things. The consensus with usergroups was to use a crushed rock bed especially if the soil is subject to movement (eg high in clay) this will allow the soil to move under the slab without stressing it as the crushed rock stones will shear past each other. Unlike most construction, there are no regulations covering concrete pavements and there is a lot of conflicting information out there. I got myself a copy of AS3727 Guide to residential pavements. Surprising this standard doesn't recomend crushed rock beds for pavements, but they seem like a good idea.

This is what I came up with for my slab.

1. Excavate approx 50mm of soil from the site (any deeper would be hard work).

2. Construct formwork with 150mm wide treated pine planks.

3. Distrubute a 75mm crushed rock bed.

4. Put F62 reinforcement mesh at the centre of the concrete area.

5. Pour 100mm of 25Mpa concrete.